Freighter attacks the guarded ship in the Port of Los Santos. Franklin provides sniper cover from the bridge while Michael boards and plants explosives. Trevor recovers the device after the ship sinks. Gold depends on protecting the quiet approach before the mission’s later scripted alarm.
Step-by-step walkthrough
-
Set up Franklin’s sniper position
Meet the crew at Floyd’s apartment, drive to the bridge and move Franklin to the marked vantage point. Michael approaches the freighter from the water. Use the sniper scope to identify guards along his route.
Take suppressed, accurate shots at isolated guards before they spot Michael. Aim for heads wherever possible: the mission asks for 12 headshots, 12 stealth kills and at least 80% accuracy. Wild shots or an early alert undermine several conditions together.
-
Plant the charges without raising an early alarm
As Michael, move to the bow pillar for the first charge, then use the ladder and follow the route to the first and second masts. Attach the sticky bombs at the marked positions rather than throwing them from a distance.
Switch to Franklin when Michael needs cover and remove guards who threaten the route. Continue to the stern entrance. No Alarms applies to reaching the ship’s interior undetected; the later alarm that occurs as the final charge is placed is part of the scripted mission.
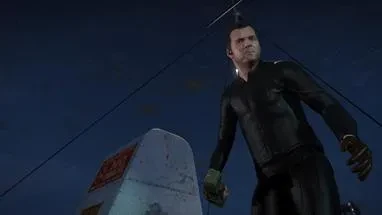
Keep the boarding approach quiet while Franklin removes threats from the bridge. -
Cover the escape and detonate from safety
When the firefight begins, use Franklin to stop the arriving guards and attack helicopter while Michael finishes the charge. Keep Michael alive and avoid shooting near him without a clear target.
Michael leaves the ship and jumps into the water. Wait until he is clear, then trigger the explosives as prompted. Detonating early or leaving the helicopter threat active can interrupt the escape.
-
Locate the device in the wreckage
Control Michael in the water and search the marked wreckage area for the device, watching for its red flashing light. Container Hunter allows one minute for the search, so head directly to the wreck rather than swimming around its perimeter.
Once the device is located, bring Trevor’s sub to it and complete the pickup. Return to the marked safe area at Pier 400, where Floyd lifts the sub out. Lester’s arrival explains why the device must be returned instead of sold; no profitable cash split follows this heist.
Gold medal checklist
- Headshots: Kill 12 enemies with headshots. Franklin’s sniper position gives controlled opportunities.
- Accuracy: Finish with at least 80% shooting accuracy. Fire only when the target is clear.
- Ninja: Kill 12 enemies with stealth attacks during the quiet approach.
- Container Hunter: Find the container within one minute after the explosion. Look for the red flashing light in the wreckage.
- No Alarms: Reach the ship’s interior without being detected. Plant charges carefully and cover Michael’s route.
Common questions
Does the scripted alarm ruin No Alarms?
No. Keep the approach quiet until Michael reaches the ship’s interior. The later alarm is part of the mission.
Do I need the Cargobob for this route?
No. Freighter requires Minisub, but the Cargobob setup belongs to Offshore.
What happens next
The story continues into Lester’s required Hotel Assassination and the FIB’s Blitz Play preparations. Offshore is the alternative Merryweather route if you want to compare the other plan.