Dead Man Walking sends Michael into the coroner’s office to check whether Ferdinand Kerimov is really dead. Michael wakes without his usual equipment, so the opening is about quietly obtaining a weapon before the escape turns into a corridor shootout. Gold requires accurate shooting and careful use of his special ability.
Step-by-step walkthrough
-
Wake up and inspect the marked body
After meeting Dave, Michael wakes on a mortuary table. Follow the prompt to get up and approach the first guard from behind. Take him down and collect the weapon so you can defend yourself. Search the bodies indicated by the objective until Michael identifies the one bearing Ferdinand’s tag.
The tagged body is not Ferdinand. Let Michael’s call to Dave update the objective before leaving the room. Searching unrelated areas wastes time without changing the result.
-
Fight upwards through the building
The lower routes are locked down, so follow the available stairs and corridors towards the upper floor. Take cover at doorways and eliminate guards before exposing yourself to the next room. Aiming from a stable position is particularly important with the initial limited equipment.
Activate Michael’s special ability while enemies are visible and use it for controlled headshots. Four kills while the ability is active satisfy Focused Killer, while headshots also contribute towards the separate total of 14. Turn the ability off between encounters to conserve it.
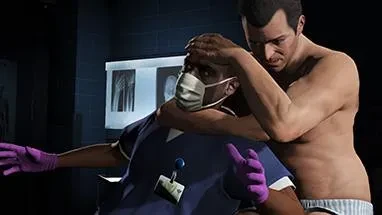
Clear the escape route room by room and use Michael’s ability for precise shots. -
Recover the equipment and jump through the window
Retrieve Michael’s clothes and weapons at the marked upper-floor location. Clear the remaining guards, then shoot the designated window and jump out into the dumpster. Do not spend ammunition breaking every pane or searching for a ground-floor doorway once the escape marker is upstairs.
There is still a wanted level after the jump. Get into a nearby vehicle, using the Felon when available on the escape route, and leave before the police close in.
-
Lose the police and meet Franklin
Break line of sight and move outside the police search cones. Use the rear route away from the building rather than driving straight into the arriving patrols. Wait for the stars to disappear before heading to the next meeting.
Michael calls Franklin and arranges a conversation at the oil derricks in El Burro Heights. Reach the marked location to finish. For the 9:30 objective, skip scenes and keep both the building route and final drive direct; a lengthy police chase is an easy way to miss the time.
Gold medal checklist
- Accuracy: Finish with at least 70% shooting accuracy. Use aimed shots rather than spraying down corridors.
- Headshots: Kill 14 enemies with headshots. Michael’s slowed aiming helps in the indoor fights.
- Time: Finish within 9:30. Skip scenes and leave the coroner’s office by the marked escape route.
- Focused Killer: Kill four enemies while Michael’s special ability is active.
- Unmarked: Finish with minimal damage to health and armour. Clear rooms from cover.
Common questions
Where are Michael’s weapons?
The mission marks his equipment on the upper floor during the escape. Retrieve it before leaving through the window.
Does jumping out end the mission?
No. Lose the police, then meet Franklin at the oil derricks to complete the mission.
What happens next
Three’s Company follows the investigation into Ferdinand’s whereabouts and brings Michael, Franklin and Trevor together for an extraction at the IAA building.