Scouting the Port gathers the information for The Merryweather Heist. Trevor must behave like a dock worker long enough to move containers, use the crane and photograph the guarded freighter. A careful approach protects both the cargo-damage and no-disturbance medal requirements.
Step-by-step walkthrough
-
Follow Floyd and move the marked containers
Drive Trevor, Floyd and Wade to Pier 400, park near dispatch and follow Floyd. Enter the Dock Handler when instructed. Align its lifting frame above each marked container, lower it into position, attach the load and raise it clear before driving.
Move slowly enough to keep the container away from stacks, posts and other equipment. Place each load in the marked area before releasing it. Ramming a container to straighten it is exactly what Employee of the Month asks you to avoid.
-
Load the trucks with the crane
Climb to the crane cabin. Move the spreader above the first marked container, lower it carefully and attach the load. Raise it high enough to clear surrounding stacks, then move over the waiting truck and lower it into the indicated position.
Repeat for the second load. Confirm alignment before releasing a container; swinging it across obstacles or dropping it carelessly risks damage. The task is about accurate placement, not moving the crane at maximum speed.
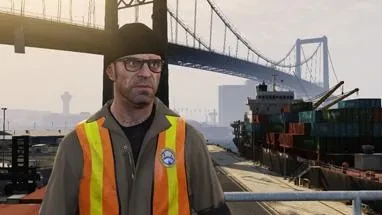
Complete the dock work carefully before photographing the freighter and choosing the heist approach. -
Take the three requested freighter photographs
Walk to the catwalk’s vantage point and use the phone camera. Photograph the front of the ship, a guard aboard the ship and the rear security area as requested by the prompts. Frame each subject clearly instead of sending three nearly identical wide shots.
Send the accepted photographs to Ron. Perfect Surveillance requires the full set as instructed. Stay at the vantage point until the photo objective is complete rather than climbing down after the first successful picture.
-
Visit the restricted dock and return to plan
Descend, get into the truck with Floyd and follow the route to the other docking area. Let the confrontation with Merryweather develop. During the distraction, take the marked briefcase from the guardhouse and leave the restricted area.
Return to Floyd’s apartment and review the planning board. Freighter attacks the docked ship; Offshore targets the device at sea. Both plans need Minisub, while Offshore also requires Cargobob. Choose the approach you intend to follow and complete its preparation markers.
Gold medal checklist
- Time: Complete within 20:00. Skip scenes and follow the work objectives without unnecessary detours.
- Employee of the Month: Move the containers without damaging them. Align lifting equipment and keep loads clear of obstacles.
- Perfect Surveillance: Take all three freighter photographs exactly as requested and send them to Ron.
- An Honest Day’s Work: Complete the dock visit without causing a disturbance. Follow the scripted work and confrontation.
Common questions
Which setup is needed for each approach?
Both approaches require Minisub. The Offshore branch also requires Cargobob to transport the submersible.
Can I skip the container work and go straight to the photos?
No. Complete the assigned dock tasks to advance the mission and reach the proper surveillance objective.
What happens next
Complete Minisub for either plan. If you selected Offshore, obtain the Cargobob as well. The next heist guide should match the approach chosen on this planning board.