Hood Safari starts as a deal on Grove Street and becomes a running gunfight followed by a Seashark escape. Gold requires 12 headshots, 70% accuracy and a finish within seven minutes. Clear the street in a controlled line rather than chasing every enemy away from the group.
Step-by-step walkthrough
-
Drive the group to Grove Street
Meet Lamar and Trevor outside Franklin’s house, enter the van and follow the route to Grove Street. Walk with the group to the marked house. The failed deal triggers the combat section, so save any optional exploration for free roam.
Skip the opening scenes when attempting the seven-minute target. The mission includes both the street fight and a police escape, leaving little room for a long detour.
-
Fight towards the exit with the group
Use walls, parked cars and other solid cover as you advance out of the cul-de-sac. Aim for exposed heads and fire short, controlled shots. Twelve headshots and 70% accuracy are separate requirements: a high kill count does not guarantee either one.
Switch between Franklin and Trevor when useful to change the angle of attack or keep the pressured character safe. Trevor’s ability helps when crossing exposed ground, while Franklin is valuable once the escape reaches vehicles. Stay near the group so the route continues to progress.
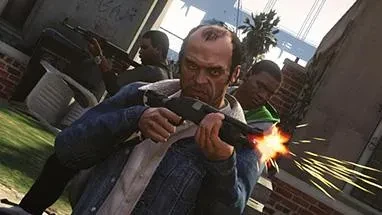
Advance with the group and leave for the channel when the escape objective appears. -
Follow Lamar into the storm channel
When police arrive and the escape objective changes, follow Lamar towards the Los Santos River. Do not stay on Grove Street trying to eliminate every officer; the objective has moved from winning the firefight to getting away.
Reach the Seasharks and board one. Accelerate along the water route while watching for obstacles and police boats. A collision that throws the rider off can cost more time than a slightly wider turn.
-
Split off and lose the wanted level
At the split, escaping alone can shorten a timed attempt because it avoids an additional companion drop-off. Use the river route and break police line of sight, keeping out of search cones until the wanted stars disappear.
If you choose to leave with a companion instead, follow the resulting destination after escaping. The exact final drive depends on whom you accompanied. The mission is complete only after those remaining objectives are resolved.
Gold medal checklist
- Time: Finish within 7:00. Skip scenes and use the solo escape option for a shorter finish.
- Accuracy: Finish with at least 70% shooting accuracy. Avoid firing into cover or after enemies fall.
- Headshots: Kill 12 enemies with headshots during the street battle.
Common questions
Do I have to stay and fight the police?
No. Once the escape objective appears, follow Lamar into the channel and reach the Seasharks.
Why did a friend need another ride after I lost the police?
Choosing a companion escape can add a drop-off. Follow its marker to finish; a solo escape avoids that extra leg.
What happens next
Continue the open Los Santos missions. Michael’s family story develops in Did Somebody Say Yoga?, while Trevor’s port visit leads towards the next heist.